SonarQube Integration With Spring Boot Application
Overview:
In the software industry delivering an application or a project or
a product with best quality is very important. The quality component plays
vital role. The quality delivery can accelerate the leverage on the product.
The high leveraged product could improve the product value and double and
triple the brand value of an organization.
To provide the best quality outcome , need to use tool like SonarQube
plugin.
SonarQube:
The SonarQube is a tool or library which can be useful to provide
cleaner and safer code.
To better understanding the SonarQube refer link,
https://docs.sonarqube.org/latest/
SonarQube Integration With Spring Boot Application:
Integrating the Spring Boot API project with the SonarQube , follow
below steps.
Step1: Make ready Spring Boot API project in the Eclipse IDE.
The build should be successful.
Step2: The Spring Boot API project is Gradle based project, execute the build.gradle file parent app.
The build should be successful.
Step3. Make ready SonarQube
To download and install the SonarQube need to provide plugin in the build.gradle file as below,
plugins {
id "org.sonarqube"
version "3.0"
id 'jacoco'
}
The Jacoco plugin also required to check the code coverage after write testcases for the project.
Step4: Add configurations in build.gradle file,
Add build script with Spring Boot dependencies and
repositories with mavenCentral() function.
ext {
sonarProjectName
= <need to give project name>
sonarProjectKey = <need to give project name>
Note: sonarProjectName and sonarProjectKey vaules might be same.
jacocoDestinationFile
= "${buildDir}/jacoco/test.exec",
sonarCodeExclusions = "/src/main/java/com/gateway/config/**”,
sonarExclusions="/src/main/java/com/**/*,
sonartest
= "src/test/java"
sonarHostUrl=<need to give your Sonar Host Url>
sonarLogin=<need to give your Sonar Login>
}
sonarProjectName à The name of
the project in the SonarQube
sonarProjectKey à A unique key
in the SonarQube
jacocoDestinationFIle à The file
which will be generating after execution testcases
sonarCodeExclusions à Which ever
the files or packages or modules do not require to consider for test code
coverage
sonarExclusions à Which the
project does not required to consider by the SonarQube
sonartest à path to the
test files
sonarHostUrl à The URL which
need to launch SonarQube
sonarLogin à This
username to login SonarQube
Step5: The above “ext“ elements need to pass to the SonarQube properties,
sonarqube {
properties {
property 'sonar.projectKey', sonarProjectKey
property 'sonar.projectName',
sonarProjectName
property 'sonar.tests' , sonartest
property 'sonar.host.url' , sonarHostUrl
property 'sonar.login' , sonarLogin
property 'sonar.coverage.exclusions'
, sonarExclusions
property 'sonar.exclusions', sonarCodeExclusions
property "sonar.scm.disabled", "True"
}
}
Also, include below properties,
subprojects {
version = '1.0'
apply
plugin: "java"
repositories
{
mavenCentral()
jcenter()
mavenLocal()
maven {
url "https://maven.repository.redhat.com/ga/"
}
}
}
Step6: Need to provide jacoco plugin, test, jacocoTestReport and jacoco in every submodule build.grable file like below,
test {
finalizedBy jacocoTestReport
}
jacocoTestReport {
reports
{
xml.enabled
true
}
dependsOn test
}
jacoco {
toolVersion
= "0.8.5"
}
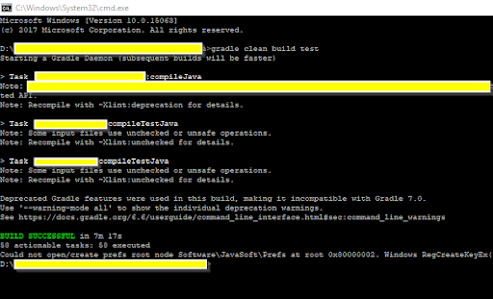
Step7: Apply gradle build clean ,
gradle
clean build test
Step8: Start the SonarQube,
To start the SonarQube execute the below command,
gradle sonarqube
Step9: Launch the SonarQube by open link,
https://sonarqube.co.someplatform.com/ (Since an URL should be confidential, This URL won't work for you)
Step10: Login with specific credentials,
Step11: After successfully login , view the home page with list of projects,
Step12: Click on the project link with your project name ,
Click on New Code tab for latest code SonarQube monitoring.
Click on Overall Code tab for overall code SonarQube monitoring.
Step13: Fix all the Bugs, Vulnerabilities, Security Hotspots , Debt, Code Smells, Code Coverage and Duplications in code.


Comments
Post a Comment